Automation rules
Automation rules are a universal mechanism for setting up processes of any complexity. Automation rules are based on the attributes and user dictionaries configured in the company.
Automation rules are an advanced alternative to the need to manually configure each individual document template. Automation rule algorithms work on the basis of initial parameters, which allows you to flexibly configure processes of varying complexity and control their mandatory nature (user intervention).
Automation rules are used to set up processes. Access to the respective directory is available to employees with the role of Owner or Administrator, as well as with a custom role that has been granted the right to work with this directory.
The automation rules are applied sequentially, in the order in which they are listed in the dictionary.
When creating rules, you should take into account that their application occurs at the moment of creating or modifying an object.
For example, if you change the Document Type field of a document, specifying the one for which the automation rule will be triggered, the result will be worked immediately. And if you return the previous value in the Document Type field, the result will also be worked out and the previously added signatures (within the automation rule execution) will be deleted.
Only those values that were added within the automation rule execution will be deleted. And those values that were added manually or inherited, for example, when copying a document, will remain unchanged.
When any changes are made to a document, the current automation settings will be applied to it. However, such changes will only apply to attributes marked as ‘hard’ and to signatures that have not yet been sent to signatories. This behaviour is intended to prevent the loss of changes that the user may have made.
Step rules
Each automation rule contains steps that are sequentially executed within the rule. A step has a number, a name, as well as conditions for its execution and actions that will be performed if these conditions are met.
For each step, depending on whether its conditions were met or not, you can configure the transition to a specific step, or to terminate the rule.
Step conditions
As a condition, you can use values from any system directories and attributes in combination with the appropriate operators (equal, not equal, etc.). Conditions can be combined using the "AND" and "OR" principles, collecting them into appropriate groups.
Step actions
The planned actions can be any options for signing, distributing a document, opening access, changing the responsible person, etc. The subjects to whom the corresponding actions will be assigned may be positions, external contacts, departments and organizations (hereinafter referred to as the Subjects).
For signing and sending actions, which always involve selecting the appropriate positions, the following options can be selected:
the absolute position of the Subject is set - the position is selected from the list
the Subject selection formula is set, which operates on the values of system dictionaries and attributes (type 1 of the formula)
the Subject selection formula is set, which operates on the attributes associated with the Subject as a condition for selecting the appropriate type of values of system dictionaries and attributes (type 2 of the formula)
As a result of working out an action based on a formula, not one, but 2 or more values of positions or external contacts can be selected, if they all meet the specified conditions.
Example of use
The proposed example contains various forms of application. If necessary, you can take only individual elements from it and use them in practice.
Staging
Create a document using the Contract with Counterparty document template. Document type: Supply Contract.
Business requirements for the document:
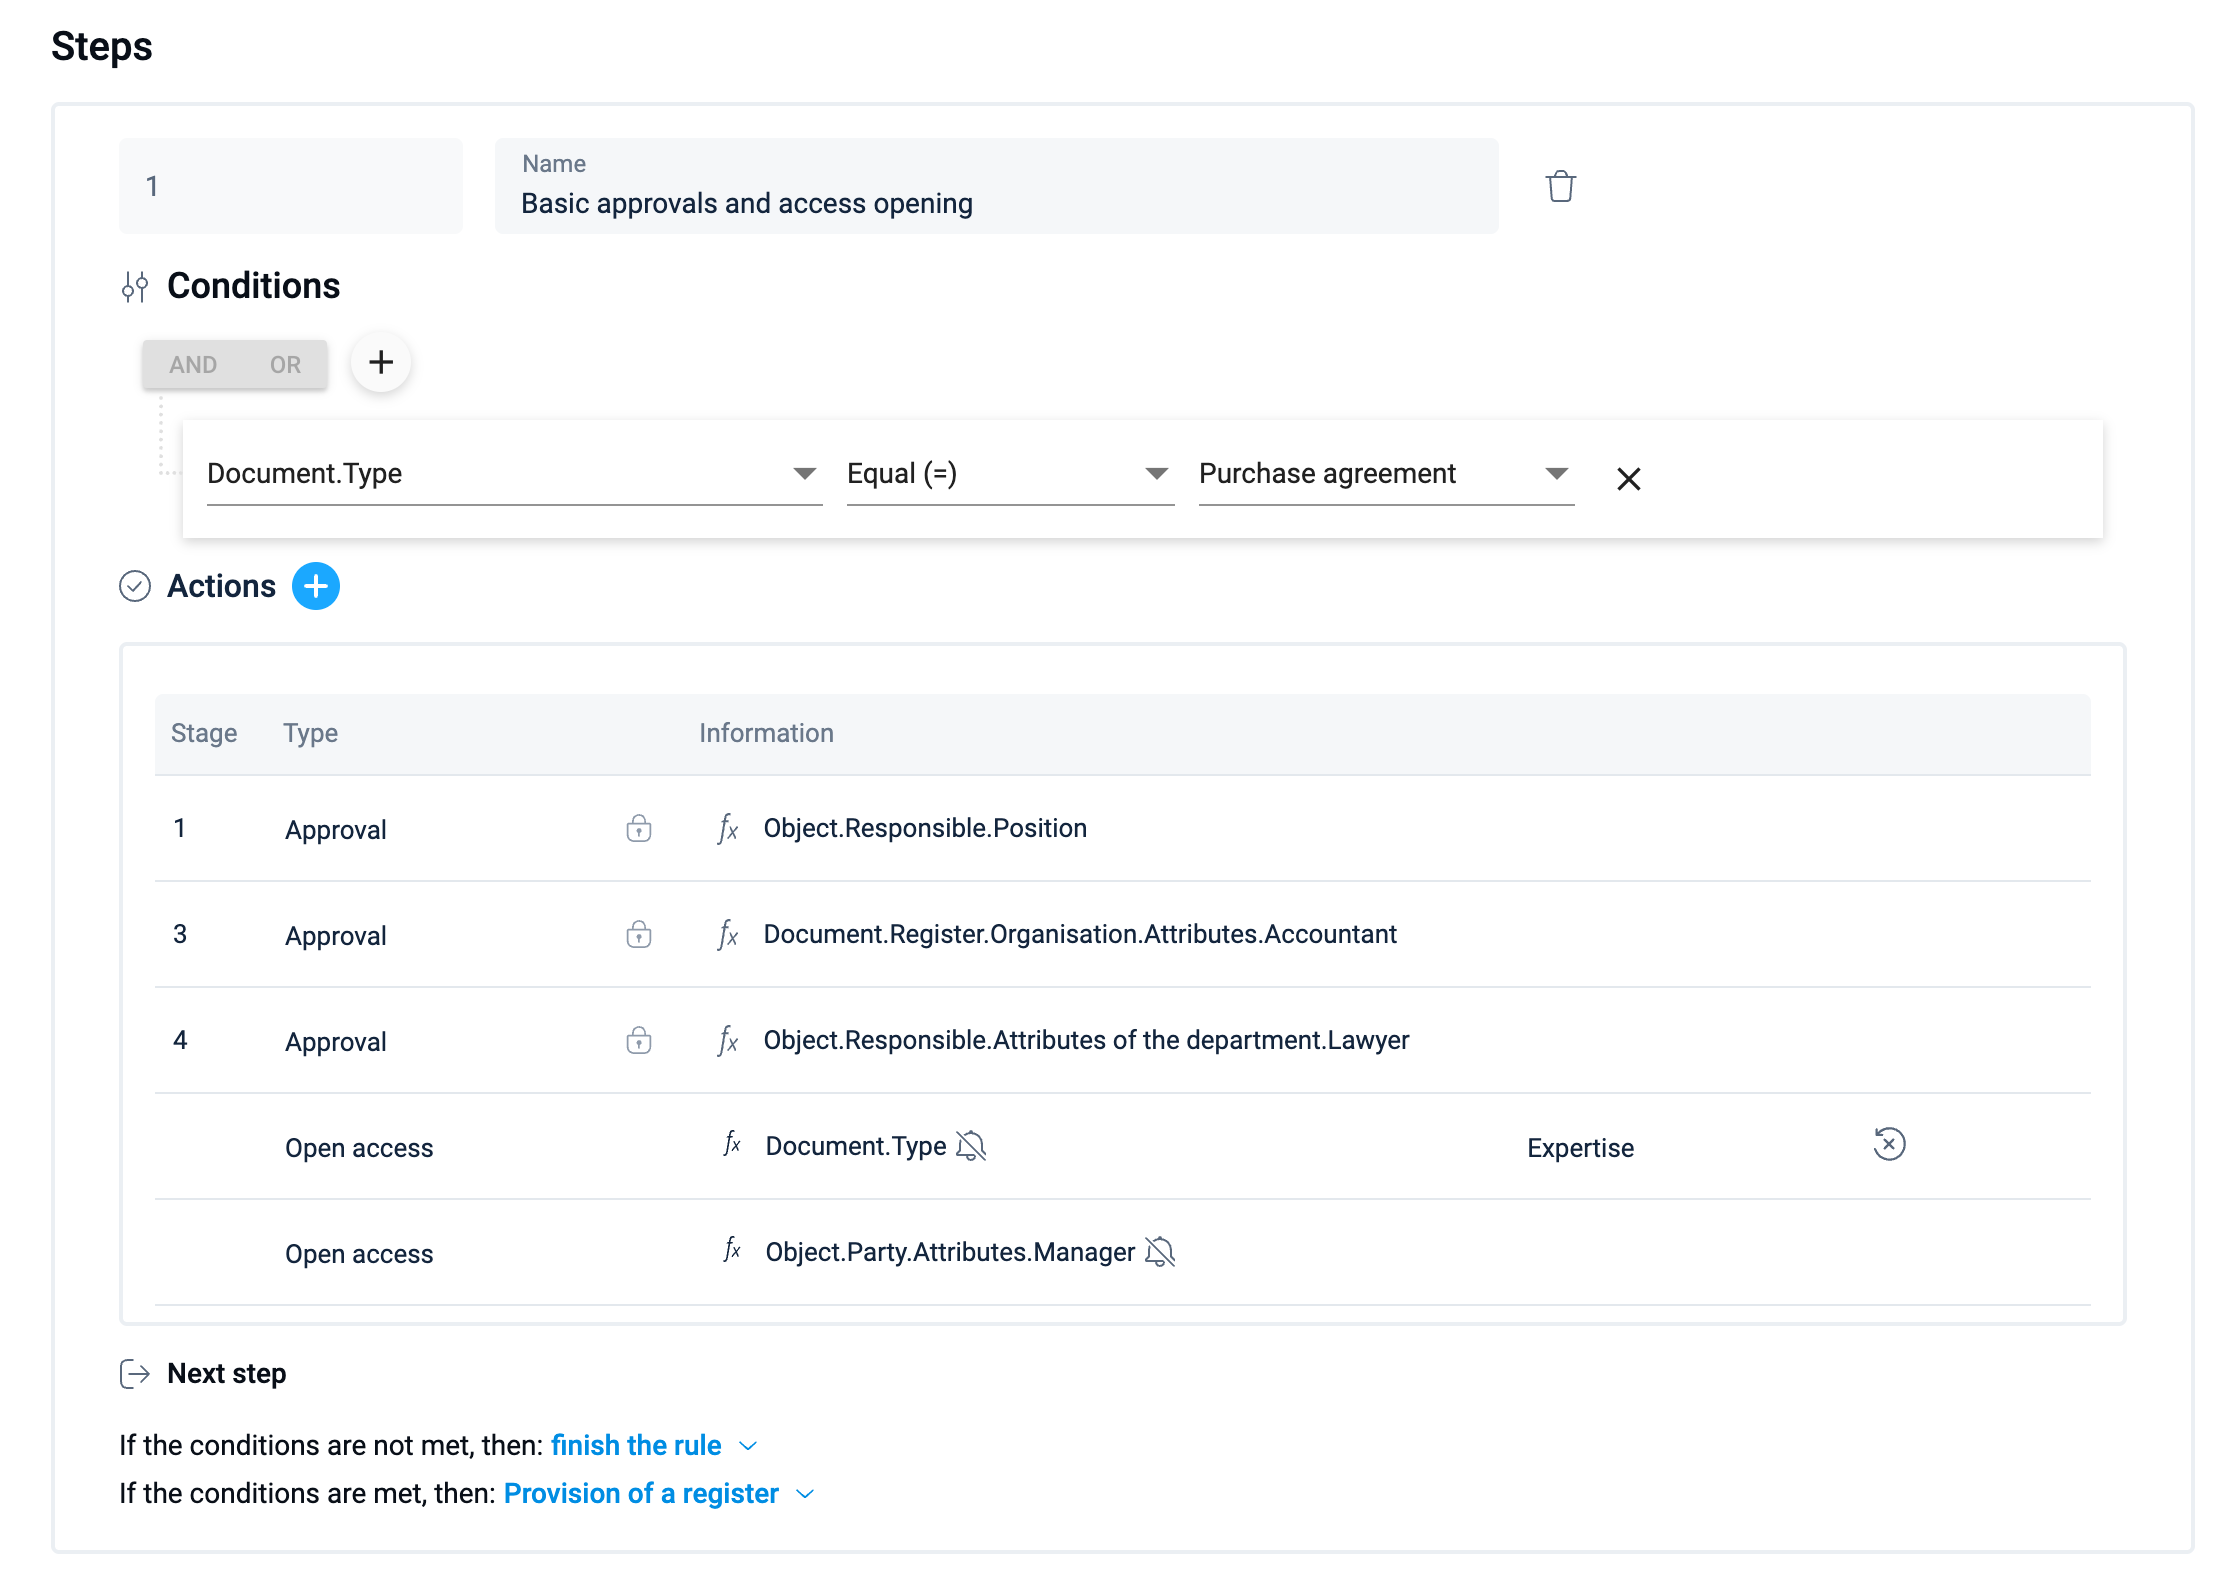
You need to include the approval of the initiator of the document.
You need to inform about the creation of the document:
a manager responsible for working with the counterparty
a specialist responsible for processing documents of this type.
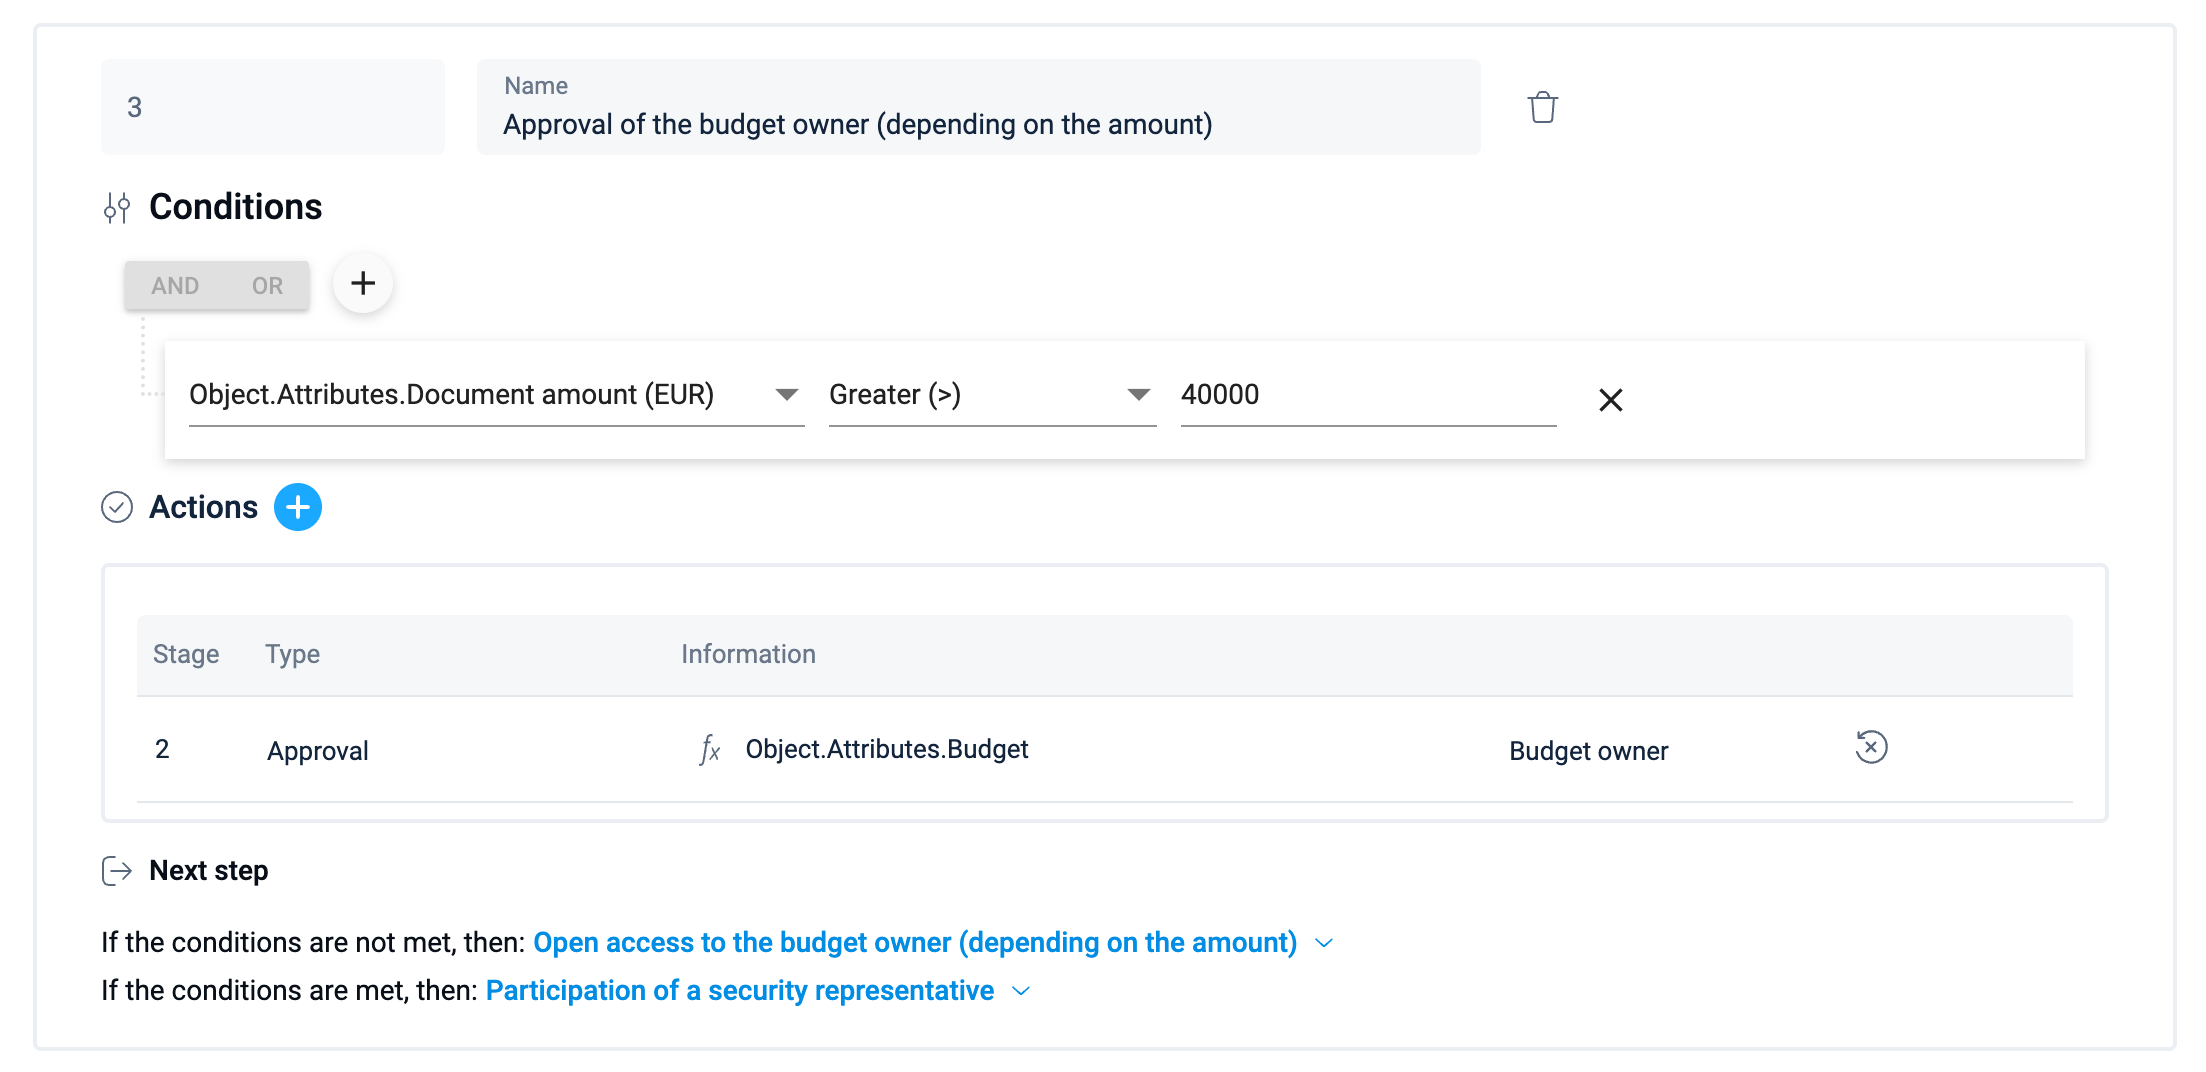
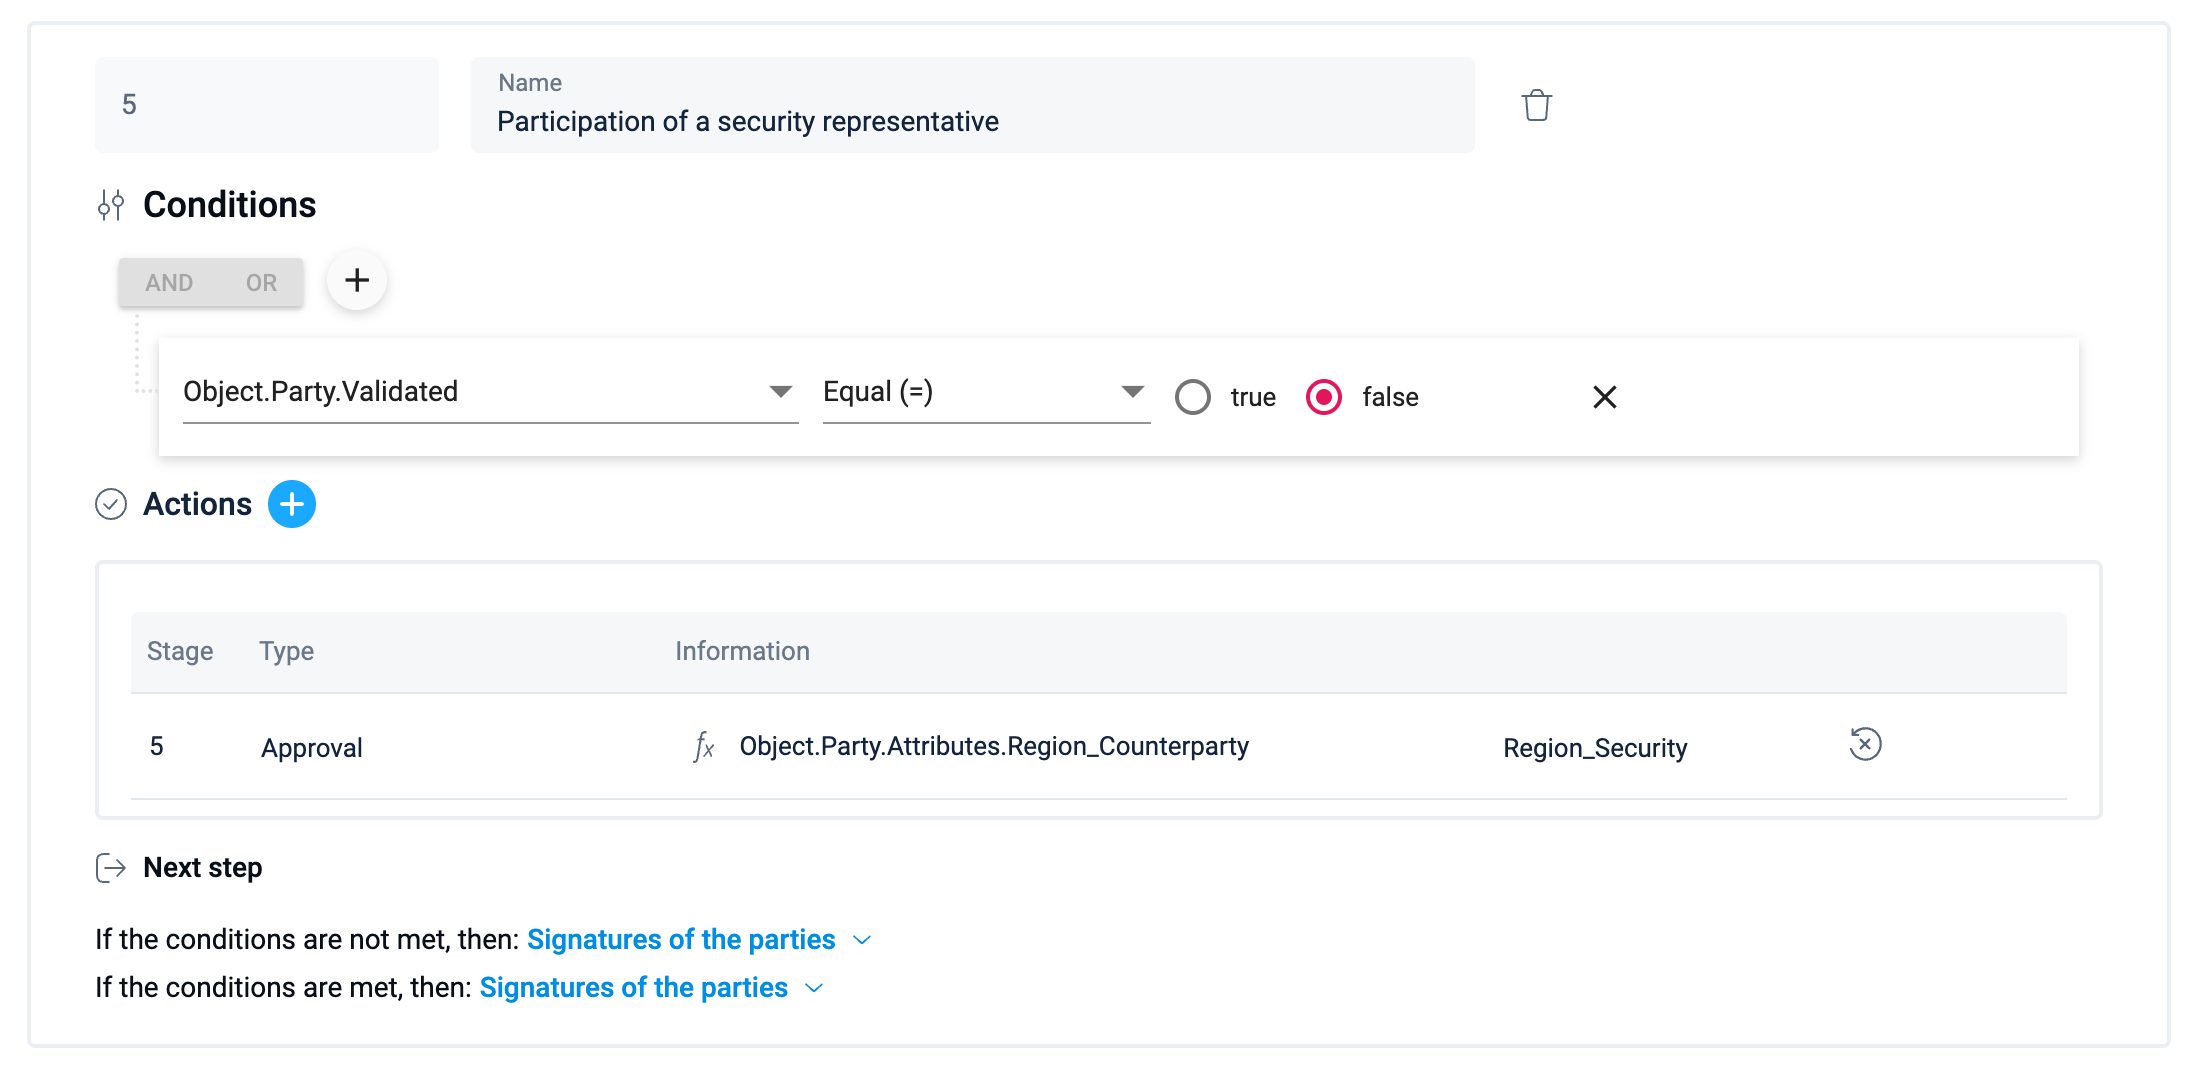
It is necessary to include in the approval of the document an employee of the security unit responsible for the region where the counterparty is located, if the counterparty is not validated.
You need to involve a lawyer who accompanies the document initiator's department in the approval of the document.
We need to include the accountant who accompanies our organization in the approval of the document.
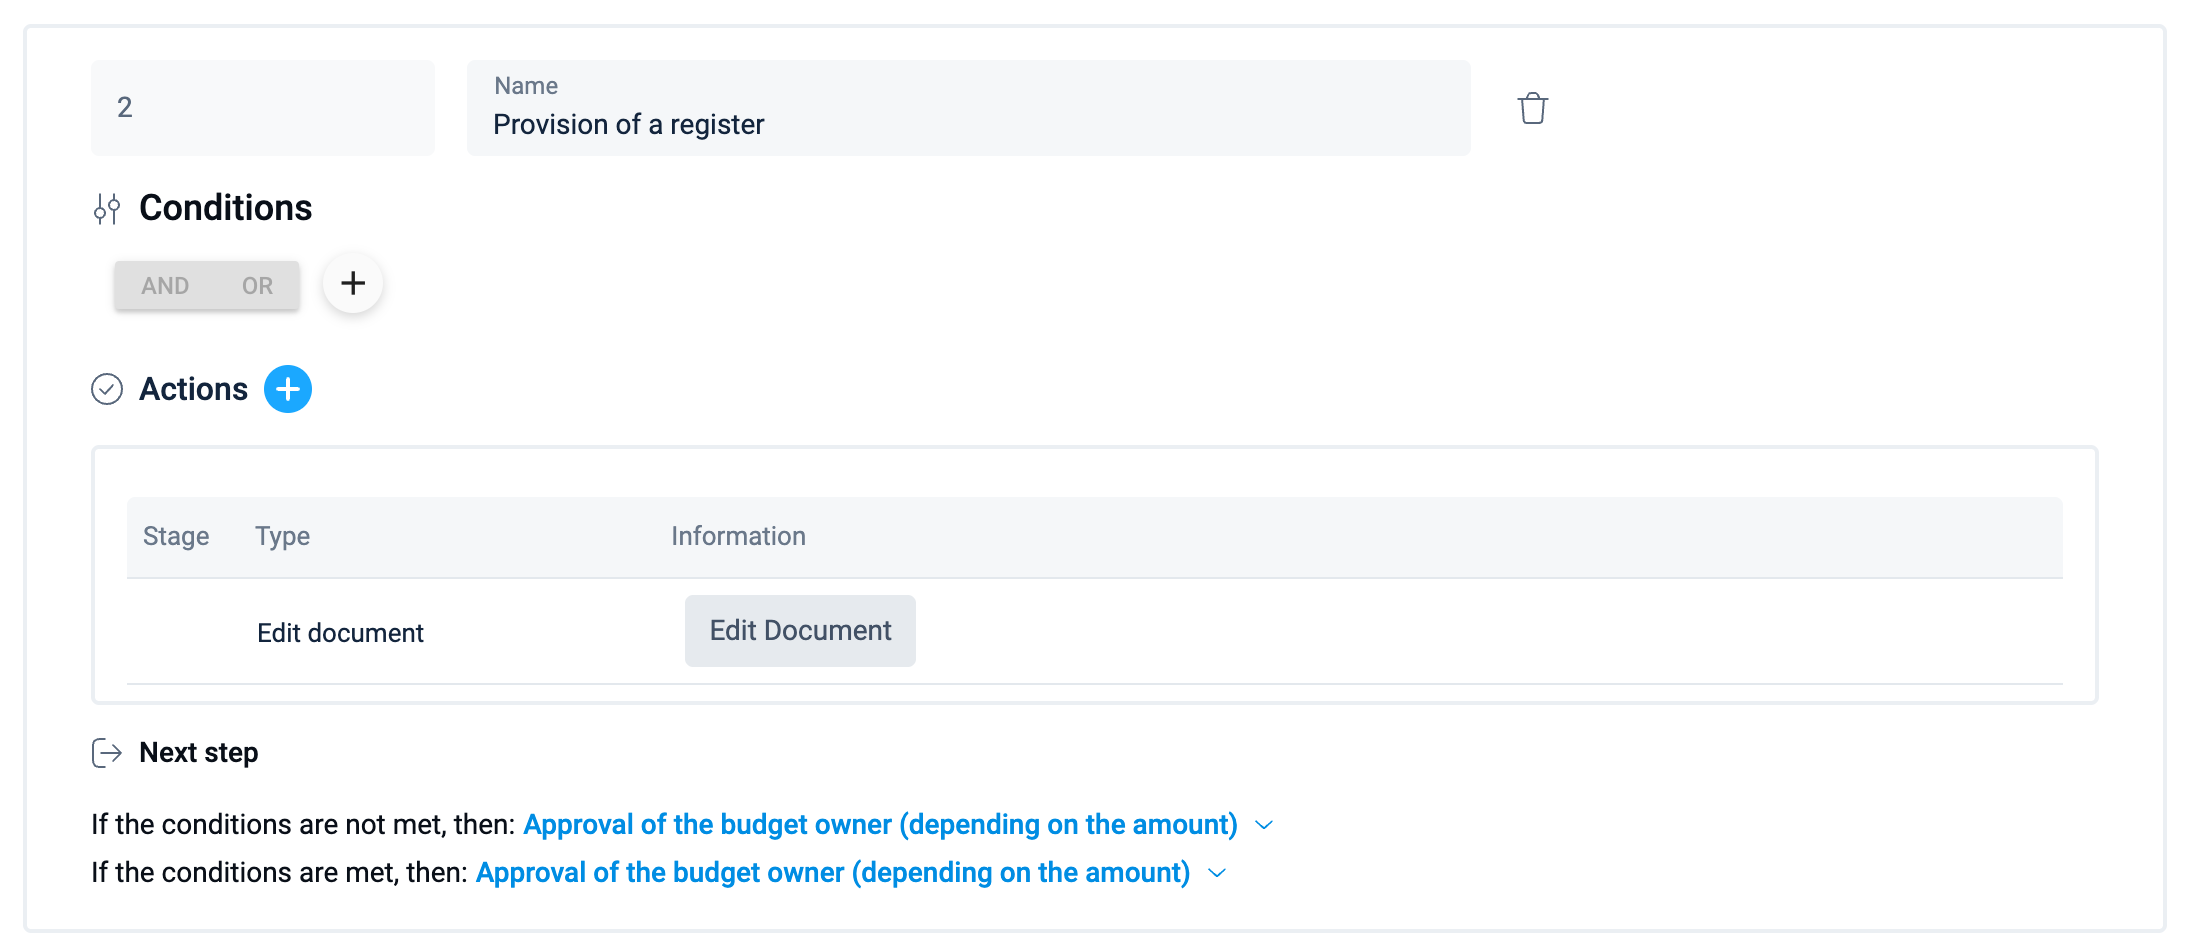
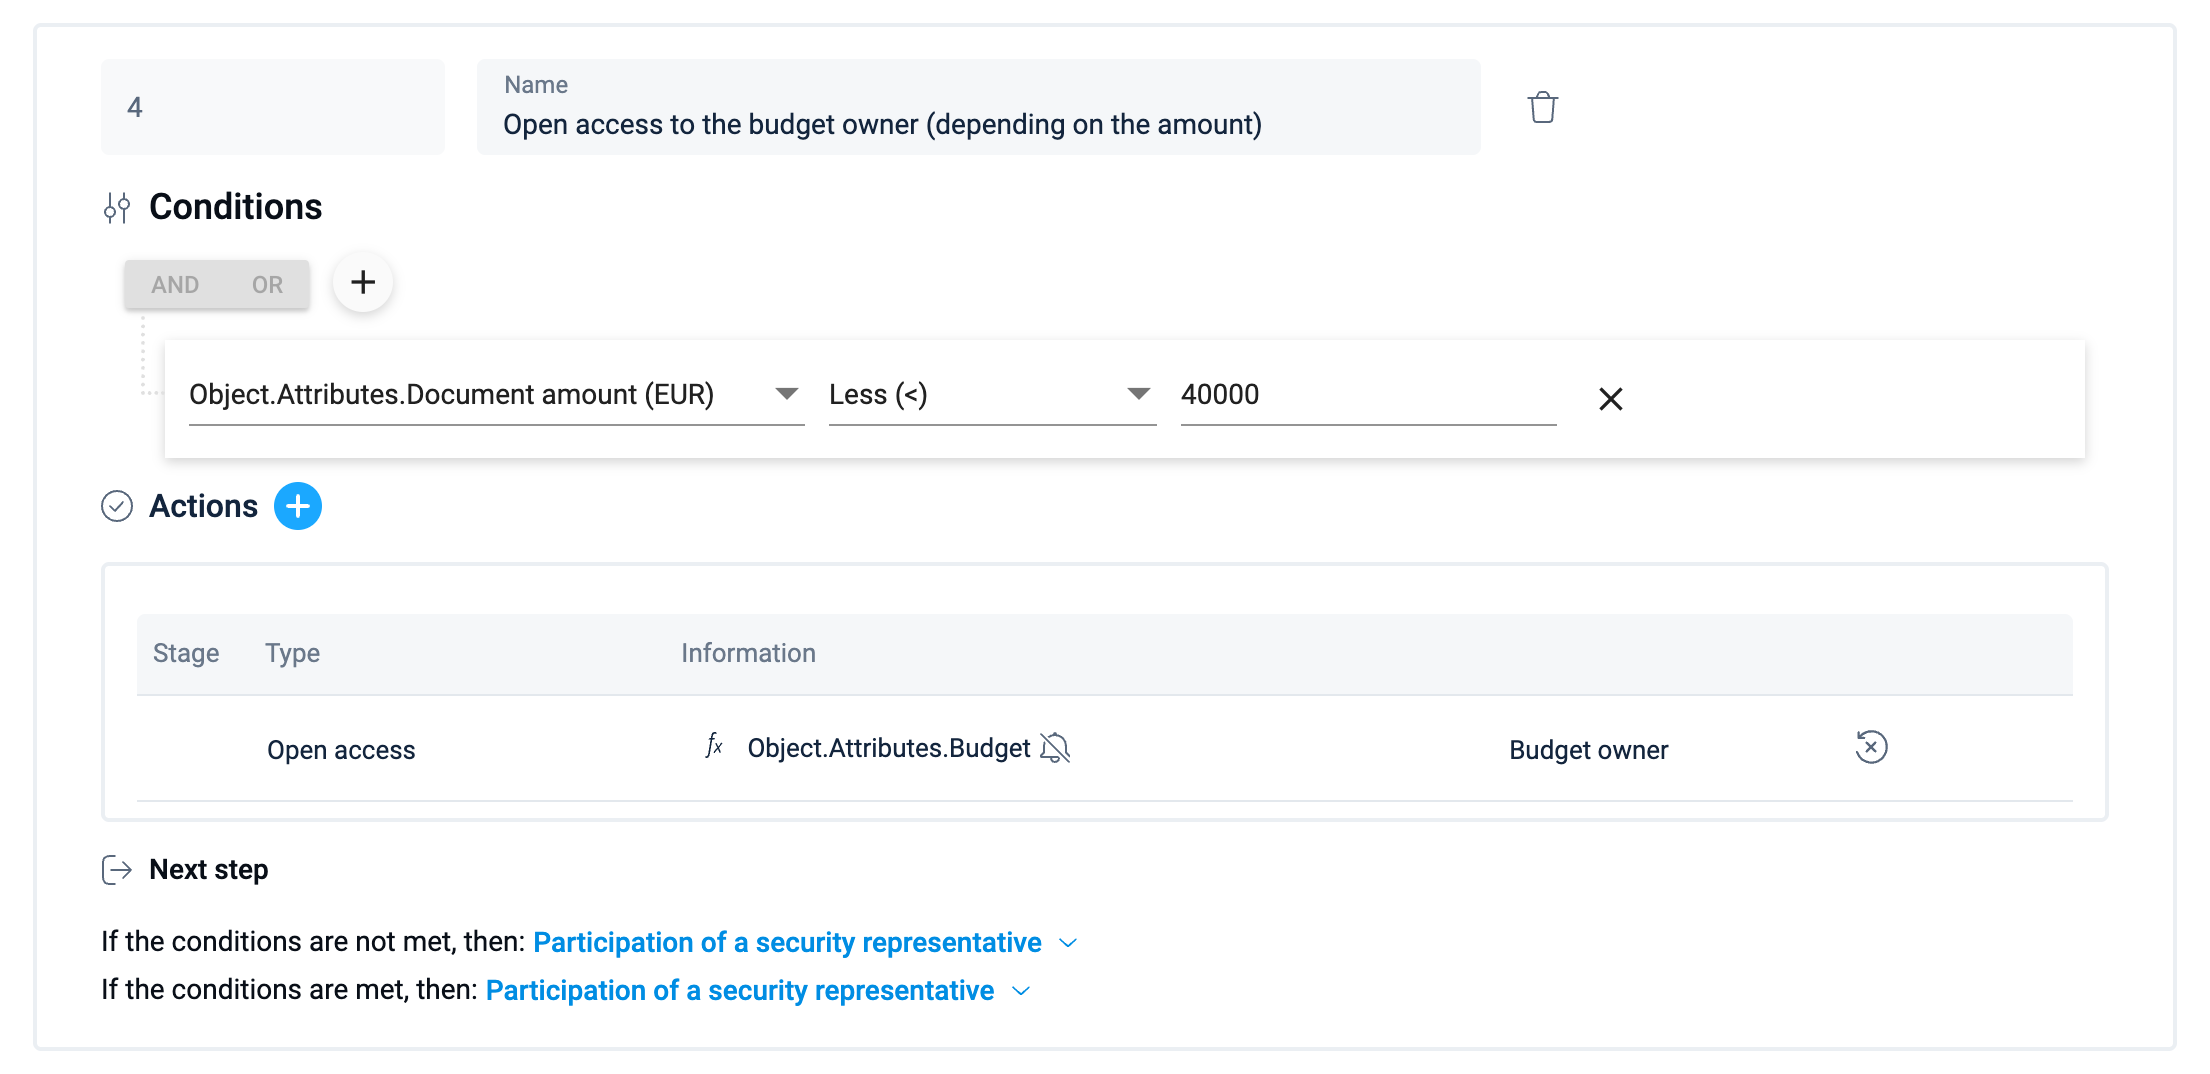
It is necessary to involve the Budget Holder (Center for Financial Responsibility - CFR) in the approval if the amount of the document exceeds 20 thousand. If it is less than 20 thousand, then open access.
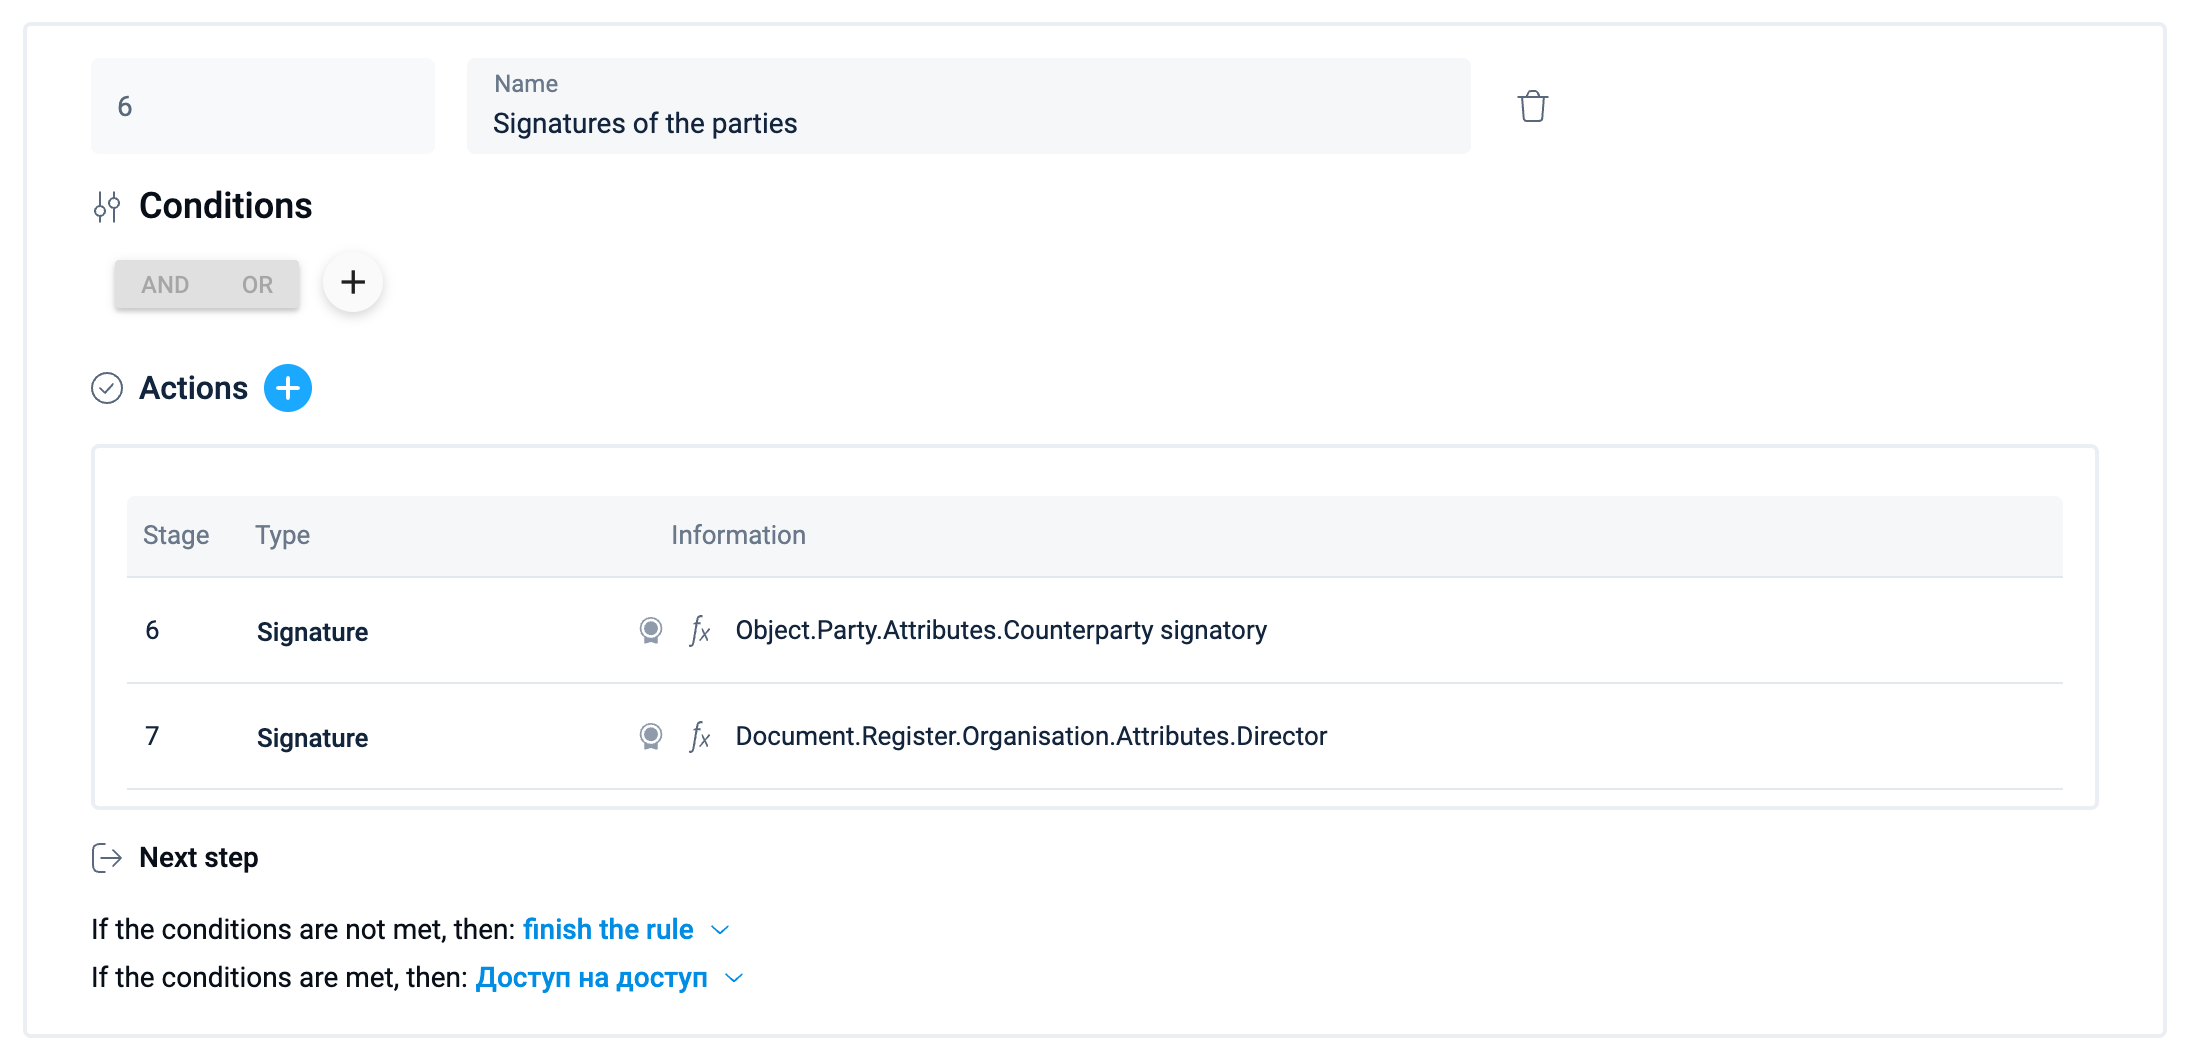
You need to include the signature of the counterparty specified in the Parties field.
We need to include the signature of the director of our organization. The ability to sign here will be blocked if the counterparty does not have the Validated status and the company has enabled the requirement to validate counterparties.
Preparing for setup
If there is no Contract purchase document type, create one. If the Contract with the counterparty document template has not yet been added, create it.
Create custom directories and fill them with values
Regions
Budgets (e.g., Production, Sales, Headquarters, etc.)
Create attributes:
Manager related to Contractors, data source - system Position directory (used for all records, mandatory)
Expertise related to Positions, data source - system custom directories Document types (not used for all records, mandatory)
Document amount associated with the Document Type, numeric (not used for all records, mandatory)
Accountant associated with Organizations, data source - system directory Positions (used for all records, mandatory)
Director related to Organizations, data source - system directory Positions (used for all records, mandatory)
Region_Counterparty associated with the Counterparties, data source - custom directory Regions (used for all records, required)
Region_SS associated with Positions, data source - user-defined Regions directory (used for all records, required, multiple values can be selected) several values can be selected)
Counterparty signatory associated with Counterparties, data source - system directory Contacts (used for all records, mandatory)
Budget associated with Document Types, data source - user-defined Budget directory (not used for all records, required)
Budget owner associated with positions, data source - user directory Budgets (not used for all records, mandatory)
Add the Document Amount and Budget attributes for the Purchase contract document type.
Fill in the attributes where necessary: for counterparties - Manager, Region_Counterparties and Counterparty Signatory, for the organization - Accountant and Director, and for departments - Lawyer. Add and fill in the values for the positions, where necessary - Region_SS, Budget Owner, Expertise.
Setting up automation
Step 1
Step 2
Step 3
Step 4
Step 5
Step 6
Formula type 2
Explanation of how to plan and understand the logic of using a formula type 2. Describe the logic of using the formula as shown in the example above:
We open access to those positions where the value of the Expertise attribute corresponds to the document type;

We add to the ‘Approval’ row those positions for which the value of the Budget Owner attribute matches the value of the Budget attribute in the document;

We add to the ‘Approval’ row those positions for which the value of the Region_Security attribute corresponds to the value of the Region_Counterparty attribute used for the counterparty that is a Party in the document.

When setting up approvals and signatures, you can immediately specify which signatures will require only a QES (facsimiles are not allowed) and which must be “hard,” meaning they cannot be deleted or replaced in the copy of the created document.
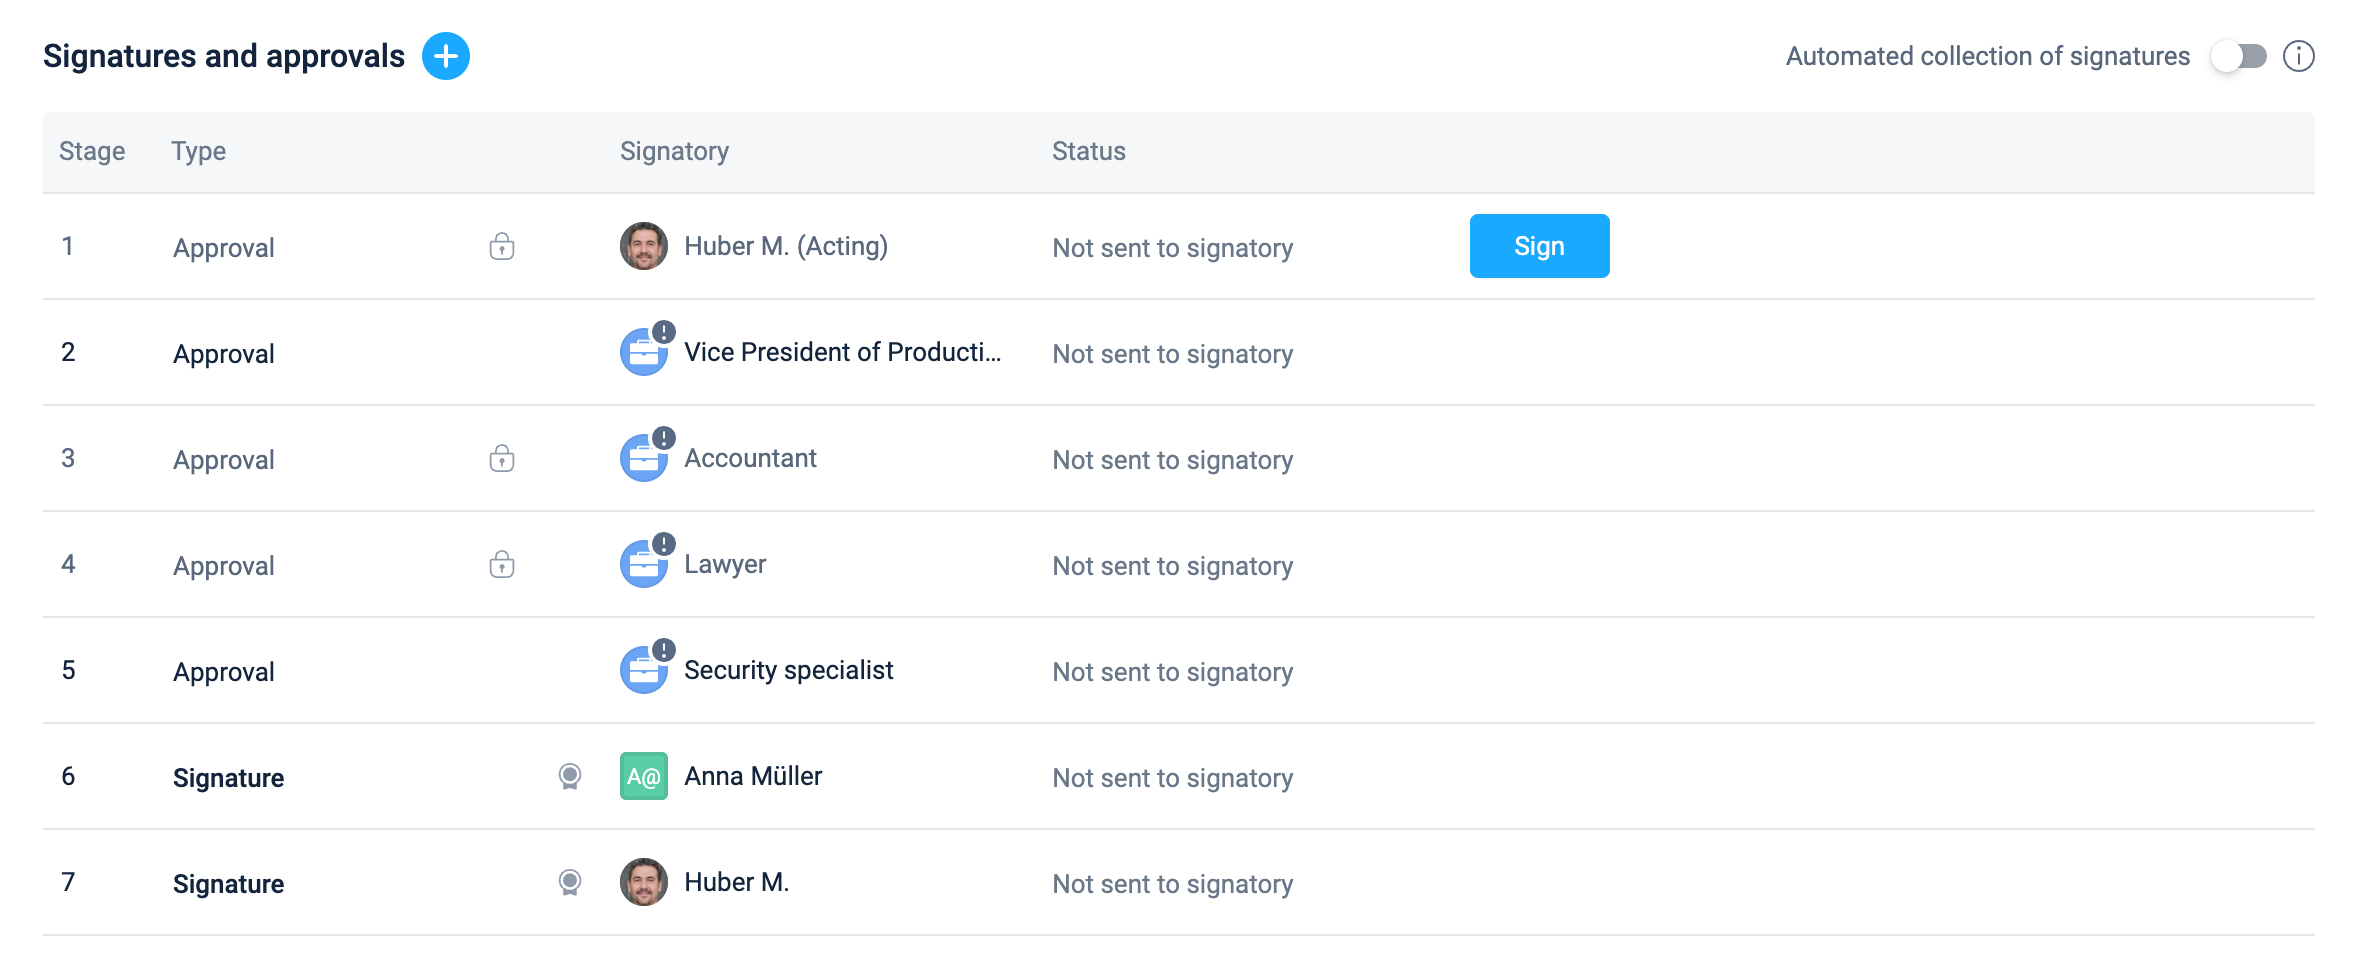
As a result, when a new document of the relevant type is created, the Approvals and signatures block will be filled with the signatures planned by the automation rule.
